
Help: Creating a Custom Design Starting From Blank
Step 1: Opening a Blank Design
- Choose from the main menu or use the keyboard shortcut Command + Option + N.
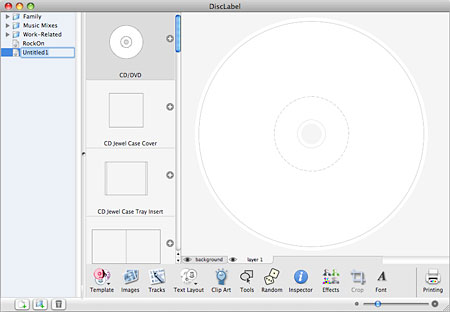
- The name "Untitled" will appear in the list of designs on the left. You can rename the design by typing a new name.
Step 2: Add A Background Image
- Open the Image Import palette by clicking .

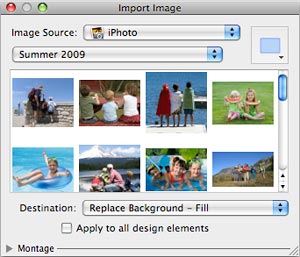
- Choose an Image Source (iPhoto, Finder, etc.) and specify an Album or Folder in the chosen source.
- Click on the Destination dropdown menu and choose "Replace Background - Fill" to fill the blank CD/DVD design with an image. Choose "Replace Background - Fit" to fit an image within the boundaries of the CD/DVD design.
- If you want to add the image to all the blank design elements, check the box "Apply to all design elements."
- Click on the thumbnail of an image to insert it into the design.
You can also create a wide variety of montages with your images and use them as backgrounds. For further instructions, see "Creating a Montage".
Step 3: Add Text to Your Design
- See "Adding Text" for details on how to add horizontal, vertical or circular text to your design.
- If you want to use iTunes Track information (see Step 4, below), we recommend you use one of the Pre-designed Text Layouts.
- You can change font, size and color of text areas. See "Formatting Text".
Step 4: Importing iTunes Track Information
DiscLabel can easily import track information from iTunes, including song titles and artist names.
- You need a text field in your design to display track information. The easiest way to do this is to click on
 and add one of the Pre-designed Text Layouts.
- Click on
 to get started choosing the iTunes playlist you want to import.
- See "Importing and Editing Tracks from iTunes" for the detailed instructions.
Step 5: Inserting Additional Images, Clip Art, Drawing Objects
- To import images (from iPhoto, the Finder, or other sources), see "Importing Images" for instructions.
- To add clip art, see "Using Clip Art" for instructions.
- To add rectangles, ellipses, lines, scribbles and polygon shapes, see "Drawing Objects" for an overview of the drawing tools available in DiscLabel.
Step 6: Printing
Once you are satisfied with the changes you've made to your design, you're ready to print. Click ![]() to switch into Print Mode.
to switch into Print Mode.
- See "Selecting Print Media" for instructions on selecting the CD labels, jewel case inserts or other media that you want to print your designs to.
- See "Print Setup and Printing" for instructions on placing your designs into the media for printing.
© 2003-2009 SmileOnMyMac, LLC. All rights reserved.
SmileOnMyMac and DiscLabel are trademarks of SmileOnMyMac, LLC.