
Help: Importing Images
You can import images into your DiscLabel designs from a variety of sources, including iPhoto, iTunes, Aperture and the Finder. DiscLabel offers a powerful Import Image function that lets you add images to all elements of your design in one-step. You can also easily import images via drag-and-drop from the Finder.
Using the Import Image palette
- Click
 in the bottom of the DiscLabel design window. The Import Image Palette will open.
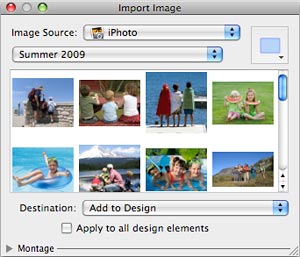
 - From the Image Source dropdown menu, choose the source of the image file you wish to import. Images can be imported from iPhoto, iTunes (album art), and Aperture as well as any folder on your hard drive.
- Click on the image you want to insert into your design. It will automatically be inserted into your design.
- By default, the first image you import is added to your design in the current active layer. After the first image is imported, subsequent images that you click on will replace the current image. There are five options in the dropdown menu:
- Add to Design
Inserts the image into the current layer - Replace Selected
Replaces the currently selected image - Replace Background - Fit
Replaces the background of the current design element. The image is automatically resized to fit into the boundaries of the design. - Replace Background - Fill
Replaces the background of the current design element. The image is automatically resized to fill the boundaries of the design. - Template Slot
Some templates have slots where images can be inserted.
- Add to Design
- If you want an image to appear in all the elements of your design (i.e. label, cover, jewel case insert, etc.), click the checkbox next to "Apply to all design elements".
© 2003-2009 SmileOnMyMac, LLC. All rights reserved.
SmileOnMyMac and DiscLabel are trademarks of SmileOnMyMac, LLC.